

Friday, April 29, 2011
Week 4: Felt Circle Flowers
Wednesday, April 27, 2011
Heart Ring

Monday, April 25, 2011
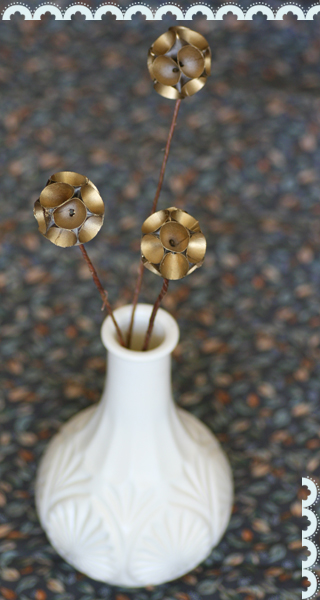
Vase + Facelift = Vaselift!

Happy Monday!
Easter has come and gone already. Can you believe it? From a craft stand point, that means we're in bit of a dry spell...except if you love weddings. Then this is like the super holiday season of weddings. And there are also birthdays. Birthdays are mini holidays sprinkled throughout the year to keep us going. I'm always a day or week late on those celebrations including this year when I made a bouquet of flowers for a friend (photos and tutorial will arrive in a few months for that one :) and needed a vase.
Friday, April 22, 2011
Week 3: Cone Flowers
What I love about these is that they work as accents. You don't have to make a ton for them to be effective. Let's say you have a live flower bouquet and you need to add an accent of a chartreuse or a pink (or whatever.) Make some of these out of card stock, hit them with appropriately colored spray paint and there you go. Done and done.
This week comes with a video! After the jump:
Wednesday, April 20, 2011
Easter Egg Card (Tutorial)

One thing I did this year was pull out my watercolor paper, paints and combined them with some new skills with masking fluid. Cards are a great way to learn new art techniques without the scary expectations of Creating Art.
I put the tutorial up at my work blog. Check it out!
PS- Everything I learned about masking I learned from the wonderful Linda Baker.
Monday, April 18, 2011
Happy Birthday

I love birthday cards. They can be sweet or funny, quiet or loud. They often have themes like cupcakes and flowers. Who doesn't love cupcakes and flowers? They are also a great excuse to get creative with what you already have laying around your studio. I made this card with a scrap piece of felt I just discovered and paint and paper I had on the desk. I almost couldn't bring myself to add anything over the green and pink background combination. But now I have that tested and approved for something else!
Friday, April 15, 2011
Week 2: Painted Stems

There's an easy solution no further than the 99 cent paint isle of your local craft store. Paint. If it's summer and you've got a lot of stems to make, pull out the spray paint. If you don't have a million to make, use paint and a brush.
Wednesday, April 13, 2011
Half Pom Boutonniere

Monday, April 11, 2011
Soft Cards

Friday, April 08, 2011
Week 1: Pom Flower and Half Tied Pom

So starting out this 52 weeks of fabric flowers; let's revisit the delightful little pom and hang out with her little sister the half tied pom.
If you find yourself saying, "What's a pom?" Well, watch the video after the jump.
If you know the pom, let me introduce you to the half tied pom. The half tied gets its name because it's a pom but you stop earlier in the process.
Note: In the video I show you how to put a stem on after you've clipped the flower. After making dozens of these, I learned a very useful tip. Glue the stem on when the flower is in a half tied pom stage. Cut after the glue has dried. This makes adding the stem infinitely more easy.
Video after the jump!
Wednesday, April 06, 2011
Bunny Circle Cuts- Tutorial

Monday, April 04, 2011
Bunny Paste Cards (Tutorial)

But sometimes I look around my studio and am aware of how much stuff I own. Also sound familiar? I bought light molding paste when I was learning the techniques in Ann Baldwin's second DVD, "Text & Texture in Mixed Media Collage," which I love. But then the light molding paste sort of sat until I looked at a stack of Goodwill bound craft supplies. I heard Sherrill's phrase, "What if?" again. This is how Paste Cards were born. They are wonderfully filled with texture and the graphic silhouette that is in so much of my work. The light molding paste is fun to use and the possibilities are limitless. Enjoy!
Subscribe to:
Posts (Atom)
